

Table of Contents
- Truck Lift Kit Installation Tools You'll Need
- Step-by-Step: How to Install a Truck Lift Kit
- How Long Does It Take to Install a Lift Kit?
- DIY Lift Kit Safety Tips
- Lift Kit Installation Alignment Requirements and Post-Install Checks
- Troubleshooting Common Installation Errors
- DIY vs. Professional Install: Cost and Legal Considerations
- Conclusion
- Frequently Asked Questions
Last Updated: October 1, 2026
Truck Lift Kit Installation Tools You'll Need
Installing a truck lift kit is a job that lives or dies by preparation, and the tools you gather beforehand determine whether the job takes an afternoon or a weekend. THE SUSPENSION SPECIALISTS offers an extensive inventory of lift, leveling, and lowering kits for vehicles dating back to 1960, and the same pattern holds across every platform: missing tools cause more delays than seized bolts do.
Here's the core kit for most suspension lift and body lift jobs:
- Safety gear: jack stands rated well above your truck's curb weight, wheel chocks, safety glasses, and gloves
- Lifting equipment: a floor jack with enough lift height for a lifted chassis
- Hand tools: a full socket set (metric and SAE), breaker bar, torque wrench, lug wrench, and a dead blow hammer
- Penetrating oil: apply it to fasteners the night before you start
- Support tools: spring compressors for strut assembly work, plus a pry bar for separating ball joints and tie rod ends
- Replacement hardware: new u-bolts, fasteners, and bushings where the kit or wear calls for them
A common mistake is reusing factory u-bolts on a lifted leaf spring stack. They stretch, and stretched u-bolts lose clamping force.
Step-by-Step: How to Install a Truck Lift Kit
The process follows a fixed order: prepare and support the vehicle, remove factory components, install the new lift components, torque everything to spec, then align the front end. Skipping the order, especially the alignment step, is where most DIY installs go wrong.
Before you start, identify your front suspension architecture. It changes the entire removal sequence, and it is the single biggest fork in the road for a DIY install.
- Independent front suspension (IFS): common on most half-ton and newer trucks. You are dealing with struts or coilovers, upper and lower control arms, CV axles, and often a differential drop bracket. Dropping the front differential is frequently required on lifts of 4 inches or more to keep CV axle angles within spec.
- Solid axle (live axle): common on heavy-duty trucks and older platforms. You are dealing with coil springs or leaf springs, a track bar, a drag link, and a steering stabilizer. The axle stays a single unit, so the geometry work centers on track bar and drag link correction.
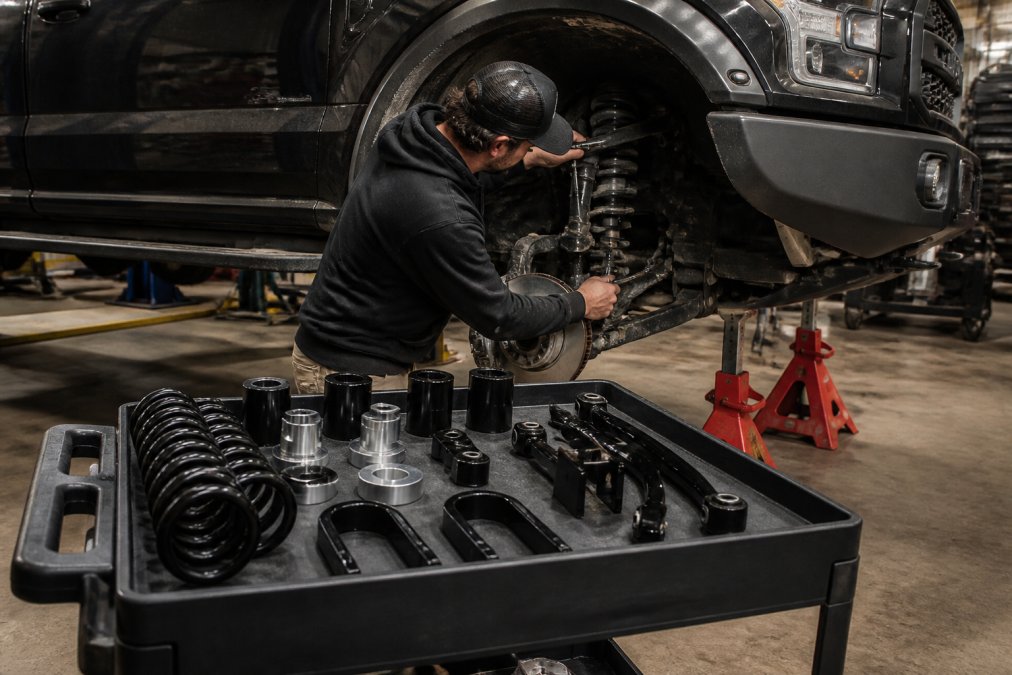
Step 1: Prepare the Vehicle and Remove Factory Components
Park on a level concrete surface, set the parking brake, chock the rear wheels, and loosen the lug nuts half a turn before raising the truck. Lift the front, place jack stands under the frame rails, then repeat at the rear. Never work under a vehicle supported only by a jack.
Disconnect the battery before touching suspension sensors. Remove the wheels, then work through the factory components. Support the axle with a jack before separating anything, and keep the factory hardware organized by corner.
On an IFS truck, the removal order typically runs: sway bar end links, tie rod ends, brake line brackets and ABS sensor wiring, upper control arm ball joint, strut or coilover lower mount, then the lower control arm. If your kit includes a differential drop, support the front differential with a jack before unbolting its mounts.
On a solid-axle truck, the order typically runs: sway bar end links, steering stabilizer, drag link and tie rod, track bar, then shocks and springs.
Step 2: Install New Lift Components and Torque Hardware
Install the new components in reverse order of removal. For a suspension lift, that means new coil spacers or springs, control arms, shocks, and a track bar or drop bracket to keep the axle centered. For a body lift, it means new body mount spacers and longer hardware between the frame and chassis.
Platform-specific notes that generic guides skip:
- IFS: after installing the lift, cycle the suspension through full droop and full compression by hand before putting the wheels back on. Watch the CV axle boots and the brake hoses. If a boot is pinched or a hose is taut at droop, the lift is too tall for the stock parts and you need extended lines or a differential drop.
- Solid axle: set the track bar length so the axle is centered under the frame at ride height, not at droop. Centering at droop is a common error that produces a truck that dog-tracks down the road.
- Body lift: loosen all body mount bolts on one side before removing any, and never lift the body more than an inch at a time. A body that shifts off its mounts is a serious safety problem.
How Long Does It Take to Install a Lift Kit?
A leveling kit typically takes 2 to 4 hours with hand tools. A full suspension lift usually runs 6 to 10 hours, and a body lift lands in the 4 to 8 hour range. Those are clean-truck numbers. Real-world time depends on four variables that generic guides leave out.
| Lift Type | Typical Time (Clean Truck) | Typical Time (Rust Belt) | Difficulty | Main Tools Needed |
|---|---|---|---|---|
| Leveling kit | 2-4 hours | 3-6 hours | Beginner | Jack, stands, sockets, torque wrench |
| Body lift | 4-8 hours | 6-12 hours | Intermediate | Jack, stands, breaker bar, penetrating oil |
| Suspension lift (solid axle) | 6-10 hours | 10-16 hours | Advanced | Spring compressors, pry bar, torque wrench |
| Suspension lift (IFS with diff drop) | 8-12 hours | 12-18 hours | Advanced | Spring compressors, pry bar, torque wrench, transmission jack |
DIY Lift Kit Safety Tips
Safety on a lift kit install comes down to three things: proper vehicle support, controlled spring energy, and never working alone under a raised chassis.
- Use jack stands rated for the load, placed on the frame, not the axle or body panels
- Chock the wheels that stay on the ground
- Compress coil springs slowly and keep your body out of the spring's release path
- Wear eye protection when separating ball joints and tie rod ends under load
- Lower the truck onto the ground before final torque on suspension pivot points
Lift Kit Installation Alignment Requirements and Post-Install Checks
A front-end alignment is mandatory after any suspension lift, and it's the step DIY installers most often skip. Lifting changes vehicle geometry: camber, caster, and toe all shift, and the result is uneven tire wear, vague steering, and a truck that wanders at highway speed.
After the install, check and address:
- Alignment: take the truck to a shop for a four-wheel alignment with printout
- Driveline angles: on taller lifts, check pinion angle and consider a shim or CV driveshaft if you feel vibration
- Headlight aim: a lift raises the beam pattern and can blind oncoming traffic
- Hardware: re-torque all fasteners and re-check lug nut torque after 50 to 100 miles
- Clearance: turn the wheels lock to lock and confirm no tire contact with the wheel well or control arms
Troubleshooting Common Installation Errors
Most lift kit problems trace back to four mistakes, and each one has a telltale symptom you'll notice on the first drive.
DIY vs. Professional Install: Cost and Legal Considerations
Doing the install yourself saves labor, but the trade-offs go beyond money. A shop brings a lift, alignment equipment, and experience with your specific platform.
Conclusion
The gap between a lift kit that performs and one that fights you comes down to preparation, torque discipline, and the alignment you schedule before the first drive. Get the right parts for your specific year, make, and model, and the install goes smoothly.
Frequently Asked Questions
How hard is it to install a lift kit on your truck?
Difficulty depends on the kit type. Body lifts are simpler, often requiring only basic hand tools and 4-6 hours. Suspension lifts involve more complex work like disconnecting control arms, strut assemblies, and brake lines, and can take 8-12 hours. If you're not comfortable with suspension work or lack a torque wrench and jack stands, professional installation is safer. Always follow the manufacturer's instructions for your specific truck.
What tools are required for a DIY truck lift kit installation?
You'll need a torque wrench, penetrating oil, jack stands, a lug wrench, a full socket set, wrenches, and possibly a spring compressor for strut assembly work. Safety gear like gloves and eye protection is essential. Some kits require a ball joint separator or tie rod puller. Having a friend helps with heavy components. Check your kit's instructions for any specialty tools before starting.
Do I need an alignment after installing a lift kit?
Yes. A suspension lift changes vehicle geometry, affecting camber, caster, and toe. Without an alignment, you risk uneven tire wear, poor handling, and steering drift. Schedule a professional alignment immediately after installation. Some kits include alignment cams or adjustable control arms to help correct angles. Skipping this step can void tire warranties and compromise safety.
Can I run 35-inch tires on a 4-inch lift kit?
Often yes, but it depends on your truck's make, model, and wheel offset. A 4-inch suspension lift typically provides enough clearance for 35s on many full-size trucks, but you may need to trim the wheel well or adjust the track bar. Check the kit manufacturer's tire size recommendations. Body lifts alone may not provide enough clearance without additional suspension modifications.
